(This post does contain affiliate links for your convenience.)
Well, good ol' Punxsutawney Phil saw his shadow this morning. I guess that means six more weeks of winter. In Texas that means six more weeks of frigid morning temperatures and hot afternoon temperatures...but who is keeping count right? I will continue to send my five year old to school in layers until spring arrives!In honor of Groundhog Day, Olivia (who will be two in 18 days) and I decided to have a Groundhog themed morning! I knew Rex would have many Groundhog activities at school and I did not want Mrs. Olivia to miss out on the fun!
We started out this morning with a Groundhog breakfast! No, we did not eat Groundhog...well, not really anyway.
The idea here was simple. I wanted to make something that resembled a groundhog and was still easy (because who has an ample amount of time...not this mom) and yummy. Simple: toast, banana slices, raisins, and marshmallows! Rex's had jelly, Olivia's did not. How did it go down? The kids LOVED it! Rex picked off the marshmallows and Olivia wanted more. But, all in all, both gobbled down ol' Phil and the side of eggs that went with it! Then it was off to school for Rex, and time for mommy and Olivia to get down to some important groundhog business.
First, I printed out a groundhog template made by Educlips! She has a fabulous set of clipart I purchased and I love using it for things like this!
You can grab the template here: Groundhog Day Template
I taped it down because it would move all over the place while she painted if I did not! I grabbed some brown acrylic paint and some sponge paint brushes then I let her begin to paint! Note: I always use an over-sized shirt for her to paint in, it just helps with the mess. I also used painter's tape to tape off the nose, teeth, and inside of the ears on the groundhog! Those will be a different color later!
Painting is great for toddlers because it encourages them to experiment with different textures, use their fine motor skills, and it is a great opportunity to talk about colors with them! Yes, it can be messy but remember, messes are good with toddlers! Sometimes I just have to take a deep breath and remember that everything can be cleaned up!
Next, I cut out the groundhog. (You will notice here she has two pages, I actually ended up just using the template I provided above which is the the one on her left side!) I let her add some pink on the nose, ears, and we left the teeth white.
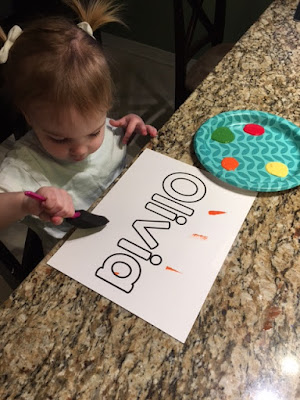
While I was cutting, I let her paint her name. Another great tip for toddlers: expose them to their name any chance you get!
Finally, we were ready to assemble our Groundhog. Here you will need a brown lunch sack and some glue. These are two items I just always keep on hand, believe it or not. I mean, you never know when a crisis will strike and you need a lunch sack, right?
Here, I just cut apart the head and the body. *gasp* Don't worry, no animals were harmed in the making of this activity. Then I let my little one glue to her heart's desire. Oh goodness, did she glue...
We glued the head on the top flap (which is really the bottom) of the sack, then we glued the body on the large part of the bag (making a puppet!)
The glare is pretty terrible in this picture but you get the idea. The stinker would not sit still for me to take a picture of her using it! She loves it though!
Next, we had a snack and took a break! :) During our break we watched this wonderful read aloud by Gail Gibbons. Now, usually I prefer to actually read to my child but I was shocked to see that we own NO groundhog books. So we found this! I have to say, it was amazing and Olivia was hooked the entire time!
After we finished our snack and video/book, we started our next craft! This one was much less involved and still just as fun!
Another thing I always have around is construction paper. We use it often!! So for this activity I took some yellow construction paper (any color will do) and cut two equal sized pieces. I measured these around Olivia's head after I cut them so I would know where to tape them!
I printed off just the head of the groundhog this time, but you could again just trim the template above! I grabbed a brown and a pink color for her to use. (Normally I give her all the colors but I knew we would have a rainbow groundhog if I did that!)
Livi did a wonderful job coloring and I cut it out. Note: Please tape the headband and do not staple it. Staples will scrape their sweet little heads.
And there you have it! Super cute, she pranced around for an hour in it! I had to put her on her changing table just so she would be still for the picture. Isn't she stylin' in that paint shirt?
We had a great groundhog day and we are excited about the winter and Valentine activities we have coming up! Thanks for taking the time to read about our day celebrating all things groundhog! When brother comes home, he will get to join in some groundhog fun too!
Until Next Time,
Hillary


No comments:
Post a Comment